So far, the results have been pretty popular, so I thought I'd put together a blog post on how I made it.
For this you will need:
- A 3D Printer (or in my case, a friend with a 3D printer - Thanks Matt!)
- Transparent PLA filament
- Metal/Plastic/Wood rods for support. I used 6.5mm diameter steel rods. They cost me about £6 for a 3m (10 foot) rod
- A Dremel or equivalent
- An Arduino nano (or cheap ebay copy)
- A 15cm micro USB female to mini USB male cable
- 2x 5mm wide addressable adafruit LED strips
- Soldering Iron
- Wire
- Solder
- Flux
- Heatshrink
- Hot glue
- 2 part epoxy adhesive
- 2 part epoxy resin
- Copydex glue (or liquid latex may work)
- Sand paper (An electric sander helps lots too)
- Black gloss spray paint
- Chrome spray paint
- Gold spray paint (I ended up using citadel Balthazar Gold and Retributor Armour as I had a load of it)
- Silver acrylic paint for edge highlighting
- Ribbon of your preferred colour - I used 4m of it just wrapping the handle!
- Clear Laquer
Ideally:
- An airbrush
- Alclad 2 Gloss Black paint
- Alclad 2 Chrome paint
- Light blue and white acrylic paints (I used Vallejo)
A while ago, while inspired by this video of an arduino power sword and Kamui Cosplay's video of her Shadowmourne axe build, I happened upon this 3D model and thought it looked so wonderful, I had to give it a try: https://pinshape.com/items/29015-3d-printed-warhammer-40k-inquisitor-sword
As this will be for my 7'4" space marine costume, we scaled it up to 150% of original size, and Matt added some small channels near the edge of the blade, going up the full length of the sword to accommodate the LED strips.
Unfortunately, due to the creative commons licence on the original files, I cannot share the updated files with the channel.
Ok, let's get on with the build..
Here's our first test - how well it fits in a space marine's hand:

Pretty well as it happens.
The Aquilla crossguard was printed in 2 halves as the up-scaled version didn't quite sit fully on the print bed. I had to do a LOT of support material removal from this one, usually with the dremel.
Then Matt discovered the joy of transparent filament, and the pommel was created:

While I was waiting for the rest of the blade to print out, I set to work on programming the Arduino.
I'd never used an Arduino before, but as I'm a computer programmer by day, it wasn't hard to pick up, especially if you already know C++.
I found a fantastic set of LED strip effects here - https://www.tweaking4all.com/hardware/arduino/adruino-led-strip-effects/ and adapted them for my own use, changing the colours and flicker effects, tweaking here and there and adding my own, then added some code to switch between them using a simple push button which I was going to incorporate into the handle. Wiring is as follows:

here's a small video of me playing with switching between the lighting effects:
Finally, the prints were done. They had to be done in 11 separate pieces to reduce errors and allow for the sword size when compared to the printer:

This sword is pretty big - banana for scale:

Next I had to get the LED strips inserted. This was a pain in the arse.
The channels we had provided worked as long as there were no blockages, which often there were.
In those cases, I had to drill down using a long 5mm drill bit, which often went wrong, requiring a couple of the pieces to be re-printed.
Eventually, I managed to maneuver the led strips down to the end of the sword and could start gluing it all together. I used a 2 part epoxy adhesive as it's very strong and also dries clear.
I also used the same 2 part epoxy as a filler to fill the gaps between the blade parts.
Make sure to sand this flat while you have the chance - you're going to want that blade as smooth as possible
All was going great until I got to the last piece of blade....
I had been testing the electrics at every stage to make sure everything was still working, but as I got to the last piece, one of the LED strips stopped working. Disaster. I couldn't pull it out to replace it as it was epoxied into a meter of sword, so I needed to fix it.
I found the cause to be a dry joint connecting the wire to the LED strip, but try as I might, I could not get the wires to reattach. I eventually had to cut a LED off the end, and solder a spare in place. This took patience, precision and lots of swearing and hot glue, but I eventually got it working again. Just to be sure, I added more hot glue. It looks a mess, but at least it works.


As you can see from the above photo, there are 2 channels for the support rods too. at 100% size, these are 5mm in diameter, but this is 150%, so the 6.5mm rods fitter quite nicely
Next, I dremelled out some channels for the wires in the handle, a hole for the push button and a space for the Arduino. Then I attached the handle to the blade and set about trimming the wires to fit them all in.
I also trimmed the ends of the metal rods to let the pommel fit


The skull pommel has been drilled through and the 15cm USB extension lead passed through and glued.

This will all need a good sanding to smooth out any further imperfections and give the paint something rough to adhere to.
IMPORTANT - BREATHING RESIN DUST IS BAD. WEAR A DECENT RESPIRATOR/DUST MASK AND DO THIS SOMEWHERE VENTILATED
After getting this far, I took a small pilgrimage to refresh my machine spirit


Painting..
Finally, I was at the stage where I could start laying down some paint.
Well almost...
If we want the fancy lightning/plasma type bits to show light through, we have to mask them off. To do this, use your Copydex/liquid latex and paint the designs through which you want the light to show through.

Once this is dry, you have 2 options.
If you don't have an airbrush, do this:
(I did this for the first side of my blade, before I had any gloss black airbrush paint)
Spray the blade with primer.
Let it dry.

Spray the blade with gloss black.
Let it dry.

Spray the blade with chrome.
Let it dry.
Or, if you have an airbrush, do the above steps, but carefully stay about 1cm away from the edge of the blade, using the precision of the airbrush.


The Alclad 2 gloss black is (as I discovered) oil based and a sod to clean out of your airbrush, but the effect is nice.

This stuff is nasty - wear your respirator!
Then, you can go over the masked edges, first with light blue, then white to enhance their general lightningness. I recommend an airbrush for this, but it could be done carefully by hand


The Cross Guard and Pommel:
These I sprayed with the following colours:
First primer, then black, then German Red Brown (Vallejo)

Then Balthazar Gold (Citadel)

Then Retributor Armour (Citadel)

Then I washed the gaps with... you guessed it. Agrax Earthshade (Citadel), before dry brushing highlights with silver acrylic (Necron compound would work well I guess)
I also airbrushed some black into the recesses to darken the dark bits.

Next comes the fun bit.
Get a small child or two to slowly remove the Copydex/Liquid latex. It's fun and they love it.


Now if you didn't use the airbrush method, you'll need to tidy up those edges.
With a mouse sander or sand paper, sand off all the excess paint from the edge of the blade for about 1cm to let the light through.
When you're happy with the blade, give it a coat or 2 of lacquer to protect the paint.
At this point, I was pretty much done, so entered the last stage - the handle.
I sealed the electrics in with a piece of acrylic, wrapped with duct tape, then set about wrapping the handle with ribbon. I was going to try contact adhesive, but this immediately soaked through to the other side of the ribbon, so I went with hot glue.


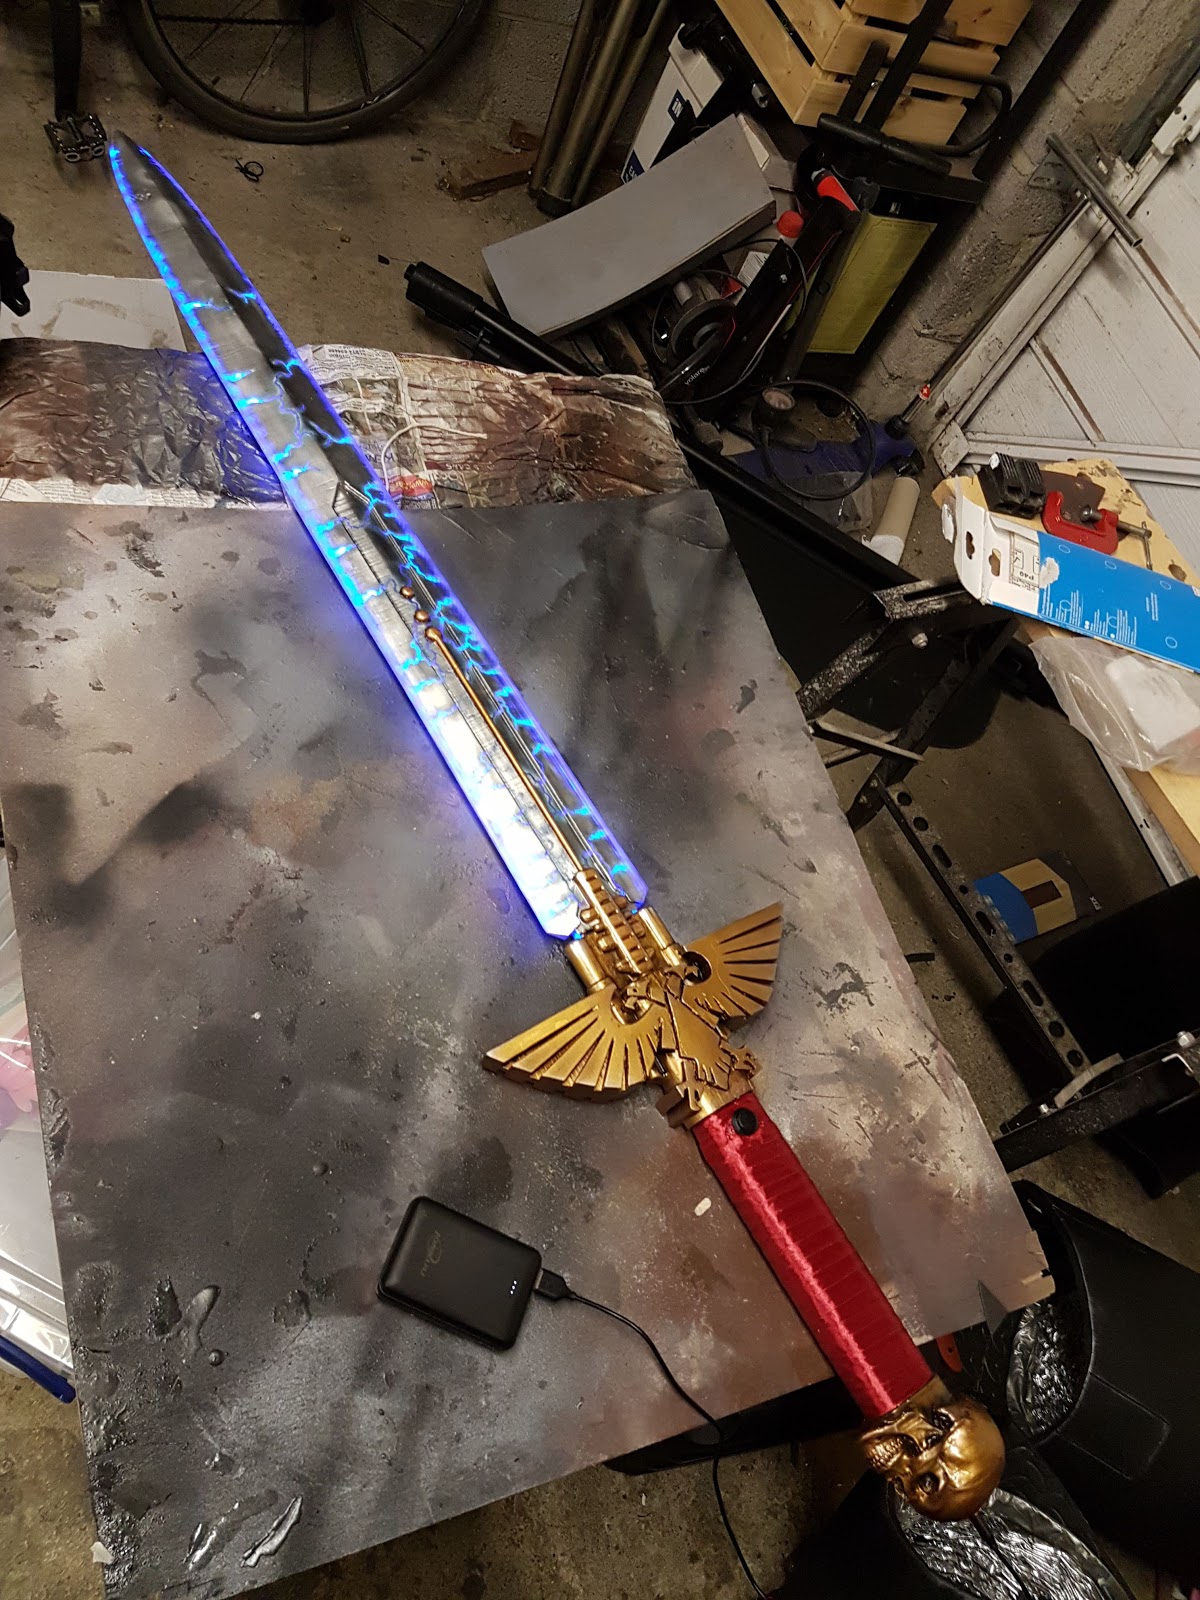
Finally it was finished!
I don't mind admitting to feeling a bit proud :)


Currently it has 10 modes it can cycle through by pushing the button:
- Blue Fire
- Red Fire
- Blue Flicker
- Red Flicker
- Blue Pulse
- Red Pulse
- Meteor
- Random Flash
- Disco (See above)
- Off
If you liked this guide, please let me know at http://www.facebook.com/weetobuilds
Take your time and feel free to ask me questions - I'll be happy to help.
Huge thanks to:
Kamui Cosplay for her informative videos, inspiration and showing how easy it can be to do electronics.
Teptec for his amazing Inquisitor Sword pattern, and making it free to use.
Hans for his Arduino LED strip code.
Matthew Everett for his 3D printing and object manipulation skills

